Installing Proxmox on Raspberry Pi
Proxmox released on ARM64 architecture on 5th August 2026. Officially they only support UEFI and hardware that is described through ACPI, like the NVIDIA Grace Hopper and NVIDIA Vera platforms.
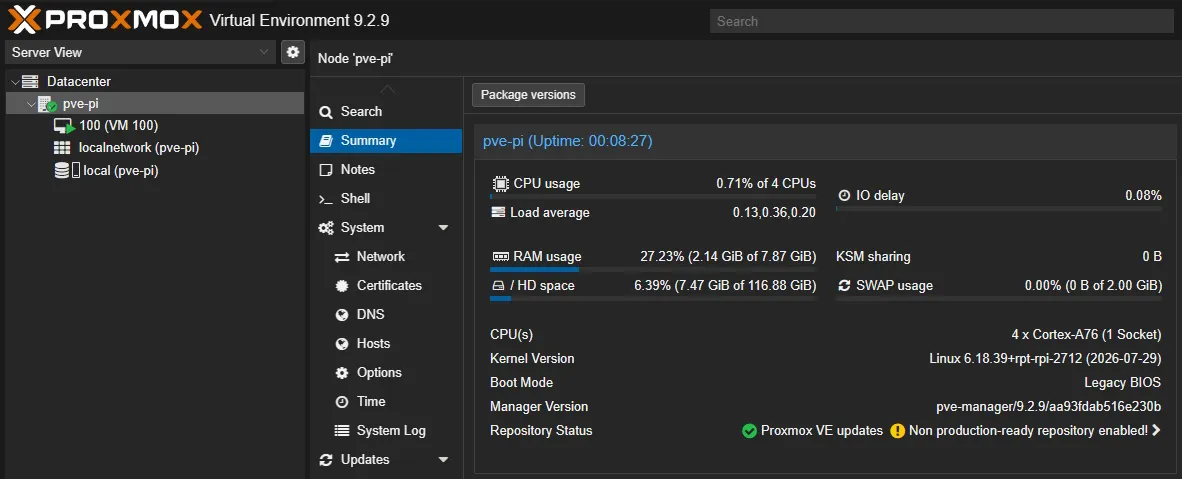
I have managed to get my Raspberry Pi 5 8GB working with Proxmox, by installing it manually on top of a fresh Raspberry Pi OS Trixie install. I highly recommend the use of an SSD or NVMe drive.
In this guide my Pi has the following network configuration
Address: 192.168.2.223
Gateway: 192.168.2.1
DNS1: 192.168.2.8
DNS2: 192.168.2.9
This guide assumes you are the root user. To become root run sudo su - from your own initial user.
Install information is from the Install Proxmox VE on Debian 13 Trixie wiki page.
Prerequisites
- Raspberry Pi 5, should work on a Raspberry Pi 4 as well, ideally 4GB model or higher
- Fresh Raspberry Pi OS Lite 64-bit Trixie, ideally to an SSD or NVMe drive
- Pi is connected via Ethernet
- SSH access
Initial Configuration
-
First we need to define our network configuration for
/etc/network/interfaces# interfaces(5) file used by ifup(8) and ifdown(8) # Include files from /etc/network/interfaces.d: source /etc/network/interfaces.d/* auto lo iface lo inet loopback iface eth0 inet manual auto vmbr0 iface vmbr0 inet static address 192.168.2.223/24 gateway 192.168.2.1 bridge-ports eth0 bridge-stp off bridge-fd 0 -
Install ifupdown2
apt install -y ifupdown2 -
Remove Network Manager
apt purge -y network-manager -
Check your
/etc/resolv.confis correct for your DNS server(s)nameserver 192.168.2.8 nameserver 192.168.2.9 -
Remove cloud-init
apt purge -y cloud-init -
Edit
/etc/hosts
Remove the old comments about the hosts file being configured/managed by cloud-init. Then update the hostname line that’s currently set to127.0.1.1to your network IP. Without this change Proxmox will fail to start.127.0.1.1 pve-pi 127.0.0.1 localhost # The following lines are desirable for IPv6 capable hosts ::1 localhost ip6-localhost ip6-loopback ff02::1 ip6-allnodes ff02::2 ip6-allroutersto
192.168.2.223 pve-pi 127.0.0.1 localhost # The following lines are desirable for IPv6 capable hosts ::1 localhost ip6-localhost ip6-loopback ff02::1 ip6-allnodes ff02::2 ip6-allrouters -
Prevent systemd using the watchdog, since Proxmox has its own
mkdir -p /etc/systemd/system.conf.d cat > /etc/systemd/system.conf.d/99-no-watchdog.conf <<'EOF' [Manager] RuntimeWatchdogSec=0 EOF -
Finally check the network configuration is ok. Running this should just return your resultant network config
ifquery -a -
Reboot
Install Proxmox
-
Add the Proxmox VE Repository
cat > /etc/apt/sources.list.d/pve-install-repo.sources << EOL Types: deb URIs: http://download.proxmox.com/debian/pve Suites: trixie Components: pve-no-subscription Signed-By: /usr/share/keyrings/proxmox-archive-keyring.gpg EOL -
Add the signing GPG key
wget https://enterprise.proxmox.com/debian/proxmox-archive-keyring-trixie.gpg -O /usr/share/keyrings/proxmox-archive-keyring.gpg -
Ensure the OS is up to date before we install Proxmox
apt update && apt -y full-upgrade -
Reboot
reboot -
Install Proxmox packages
apt install -y proxmox-ve postfix open-iscsi chronySelect Internet Site on the
Postfix Configurationstep and then leave theSystem mail nameas the default. -
Remove the non-required
os-proberpackage since we’re not using Grub to boot the Raspberry Piapt remove -y os-prober -
Disable pve-enterprise repo
echo 'Enabled: no' >> /etc/apt/sources.list.d/pve-enterprise.sources -
Remove any old packages
apt autoremove -y -
Reboot
reboot -
Check for any failed to start services
systemctl --failed -
Add your local user as a PVE Administrator, the default user is
piunless you changed it in the Raspberry Pi Imagerpveum user add pi@pam pveum acl modify / --users pi@pam --roles Administrator
Access
You can now access the Proxmox WebUI at https://192.168.2.223:8006/ and login with your local user
I’ve tested LXC, VMs and USB passthrough all working in my tests